“Sunday night. I closed my laptop and took a deep breath. ‘One pair, one session, Half a percent risk.’ I repeated it like a mantra.
See, last week I’d broken my rules—chased losses, ignored my zones. So this weekend? I went back to basics. I:
- ✅ Froze the charts Saturday: No staring at candles. Just rest.
- ✅ Reviewed ONLY Friday’s key levels: That H4 liquidity point at 1.35637 & the M15 supply zone at 1.36997. Nothing else.
- ✅ Wrote my Monday plan: ‘If the price gives me a bullish confirmation, i’ll target the supply & for a bearish confirmation i’ll target the H4 liquidity level. If not? Wait.
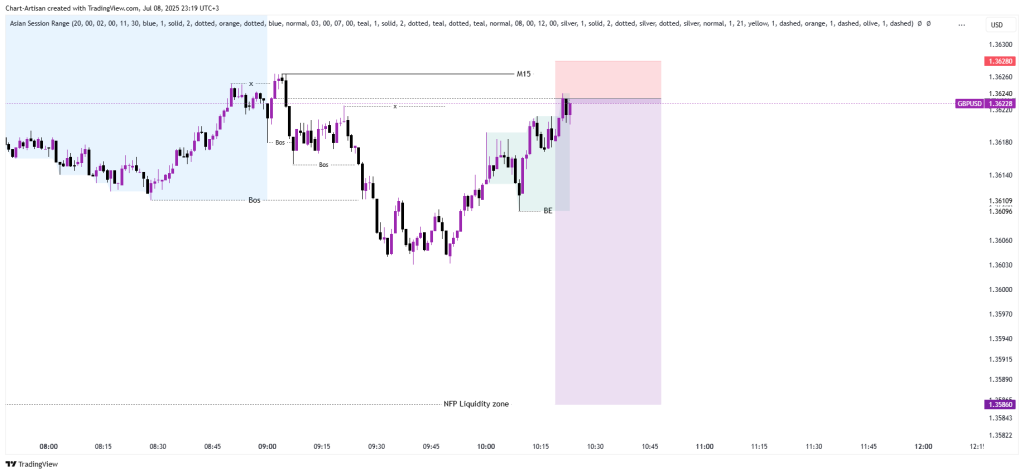
Monday morning, Asia was chilled breaking the lows. Demand was failing and supply was in control. ‘This is it,’ I thought. But I didn’t slam the sell button. I waited for Asia close to gain more confidence to attack the London session.
Everything i wanted to see was now present at the London open.
This is how a disciplined calculated risk turned into an 8R payday. No magic. Just pure liquidity warfare. Buckle up—I’m breaking it all down.
The Big Picture: HTF Liquidity Hunt (My Secret Weapon)
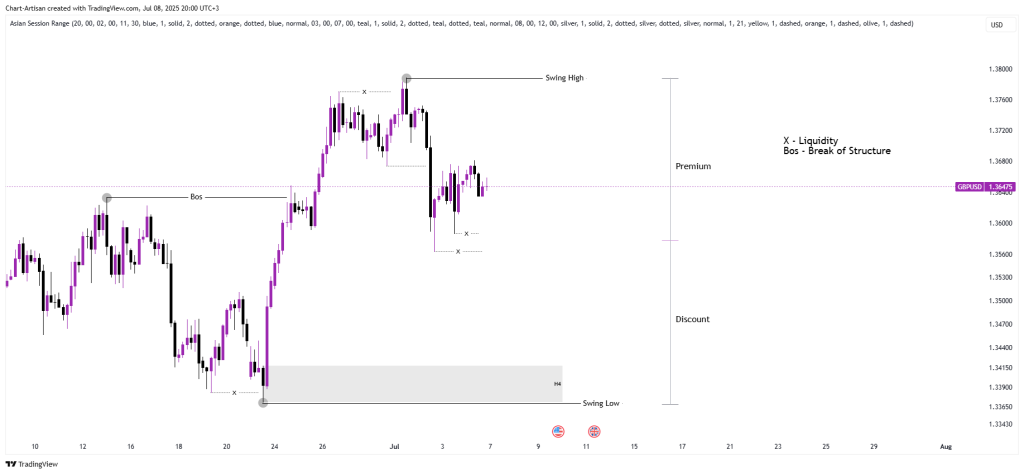
H4 Liquidity Target: The “Why” Behind the Move
“I always start high! Last Friday’s close left a juicy H4 bullish liquidity pool (those trapped buyers!). My thesis:
✅ If the price opens bullish, I’ll watch for potential shorts from M15 supply zones
✅ If the price opens bearish, i’ll look for a potential continuation setup to take out the H4 lows.
“As Dr. Elder says: ‘The goal is to make the best trades…’ Monday’s 8R win wasn’t about the money — it was about executing my liquidity blueprint flawlessly.”
Key Catalysts Igniting the Move
- 🔥 UK Services PMI miss (53.1 vs. 54.7 forecast)
- 💨 USD momentum from Thursday’s hot NFP revisions
- 🌪️ Low liquidity amplifying moves (Asia snoozed!)
🎯 Trade Blueprint: M15 Zones + M1 Precision
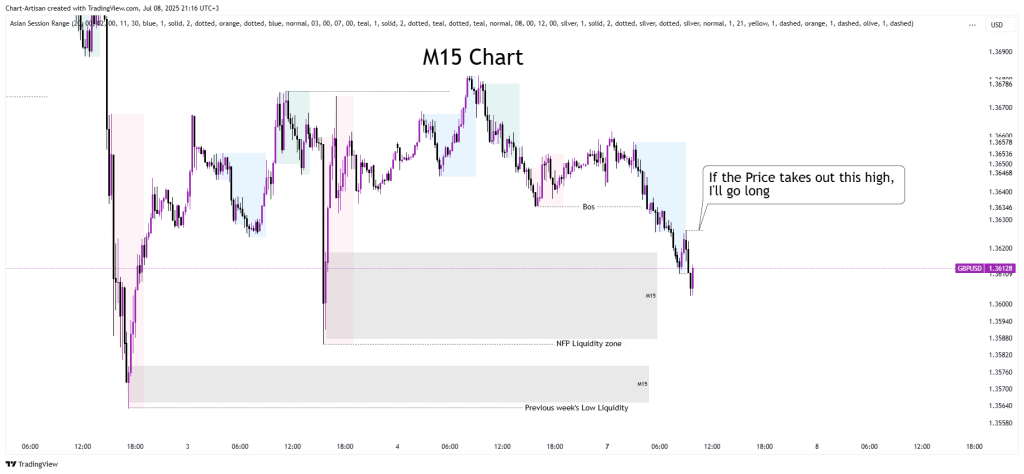
My mentor told me, ” The price takes liquidity to fuel the next move.”
I knew these M15 demand zones will not hold the price. I stayed patient and mapped all the supply zones that could probably hold the price to take out the demand.
M15 Supply Zone: My Bias Trigger
- Supply Zone : (valid since demand is not in control)
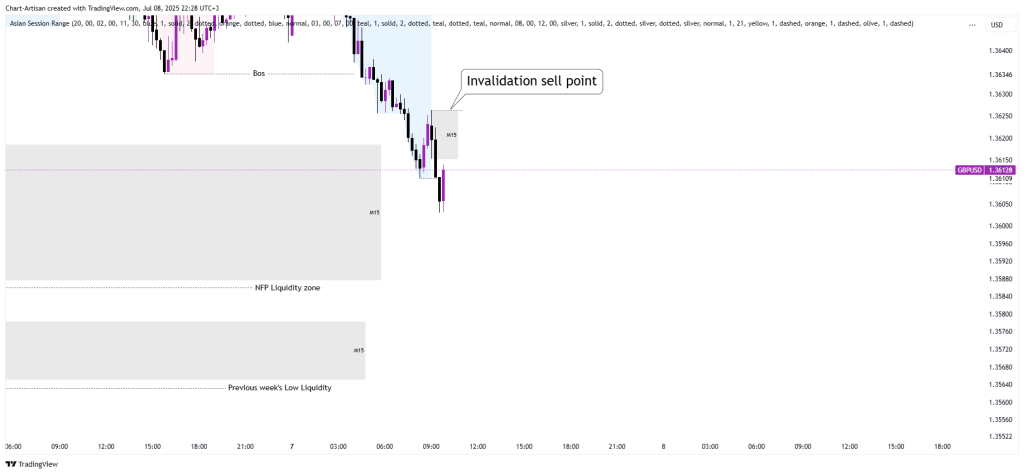
- Bias Confirmation: Bullish, only if the invalidation sell point is violated.
Entry Strategy: M1 Sweep & BOS
“Patience is a sniper’s best friend.”
The Plan:
- 🎯 Spot Swing targets on H4.
- 🕵️ Watch M15 for possible direction bias and entry zones.
- 🔫 Enter on a confirmed entry model on M1.
Trade Execution: The 8.R Snipe (M1 Timeframe)
The Perfect Storm Unfolds
I had two zones on M1 timeframe. To avoid missing out on the possible opportunity, i had to set limits for both.
The long awaited kill zone moment was here. It’s either -1R or + 8R.
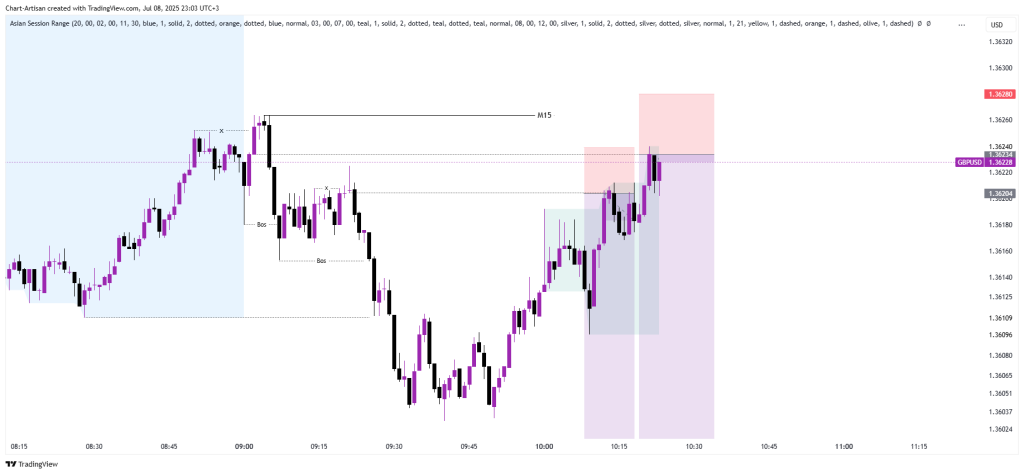
The market liquidated my first position after a few minutes into the London Open session. The confidence in me knew that one of the entries should cook and deliver profits.
“Like Paul Tudor Jones says: ‘Play great defense, not great offense.’ That first 0.5% loss? Defense. The 8.3R win? Offense built on defense.
Remember: London open is a stop-hunt frenzy. But if you know the liquidity map, losing small means winning big later.”
My first trade died, but I didn’t panic. Why? Douglas taught: ‘Focus on the trade, not the money.’ I traded the levels, not the fear.”
After the first position failed to bag profits, i had a winning mindset on the extreme entry.
For a split second, My ego whispered: ‘Maybe the liquidity sweep won’t happen… Maybe my zones are trash.’
But then I grinned.
Why? Because I’d seen this before: ‘The real move comes AFTER the trap.’
“The best trades aren’t the easiest. They’re the ones where you trade your plan, not your panic.”
Why This Worked Like Clockwork
- HTF liquidity raid ✅
- M15 Supply zone ✅
- M1 sweep + Break of structure ✅
“Three confirmations = high-probability cannonball!”
✨One Golden Rule (Monday’s Wisdom)
“Trade the liquidity map, not the news ticker!”
Monday proved it: I rode the wave. Your chart is a battlefield – liquidity is the king.
📈 H2: Performance Tracker & Prop Firm Discipline
Risk per Trade: 0.5% | Day P/L: +3.5% | July P/L: +3.5%
“One session, one pair, laser focus.”
🗣️Your Turn! (Let’s Level Up Together)
“Ever caught a liquidity sweep trade? What’s your HTF trigger?
👉 COMMENT below – I’ll be happy to see what you did!”
(P.S. Hit ‘Subscribe’ for daily recaps – no spam, just vibes!)